24 Must-Try Trending Desserts for Every Occasion in 2025
If you’ve got a sweet tooth or just want to impress at your next gathering, check out these 24 trending desserts for 2025. From show stopping cakes to bite-sized treats, we’ve compiled a list that’s perfect for any occasion. Whether you’re planning a birthday party, a cozy dinner, or simply treating yourself, there’s something here for everyone to enjoy!
1. Dubai-Style Pistachio Chocolate Desserts
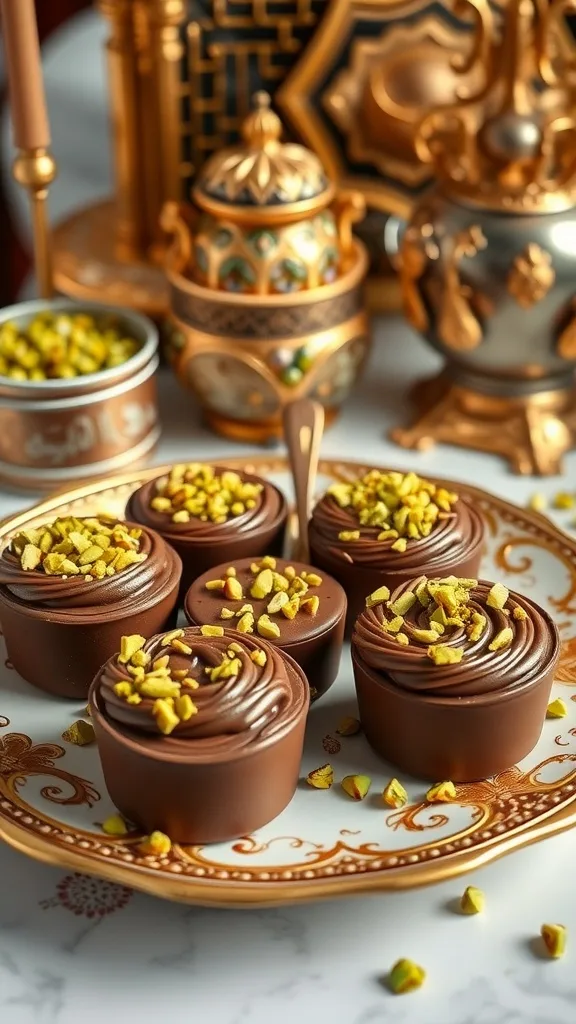
Dubai-style pistachio chocolate desserts are a true treat for the senses. Imagine rich, velvety chocolate paired with crunchy pistachios, creating a delightful contrast in texture and flavor. These desserts often come beautifully presented, making them perfect for any occasion, from casual gatherings to elegant celebrations.
The image showcases a stunning arrangement of chocolate desserts topped with chopped pistachios. The shiny chocolate surface glistens, inviting you to take a bite. The intricate details of the plate and the golden accents in the background add a touch of luxury, reminiscent of Dubai’s opulent dining scene.
These desserts are not just about looks; they are packed with flavor. The combination of chocolate and pistachios is a classic that never disappoints. Whether you’re enjoying them after a meal or serving them at a party, they are sure to impress your guests.
Ingredients
- 1 cup dark chocolate chips
- 1/2 cup heavy cream
- 1/4 cup unsalted butter
- 1/2 cup crushed pistachios
- 1 teaspoon vanilla extract
- 1/4 cup powdered sugar
Instructions
- Prepare the Chocolate Mixture: In a saucepan, combine dark chocolate chips, heavy cream, and butter. Heat over low heat, stirring until melted and smooth.
- Add Flavor: Remove from heat and stir in vanilla extract and powdered sugar until well combined.
- Set the Mixture: Pour the chocolate mixture into small molds or cups. Refrigerate for about 2 hours until set.
- Top with Pistachios: Once set, remove from molds and sprinkle crushed pistachios on top for a crunchy finish.
- Serve: Arrange the desserts on a decorative plate and enjoy!
2. Fruit-Shaped Mousse Cakes

Fruit-shaped mousse cakes are a delightful trend that combines art and flavor. These cakes mimic the appearance of real fruits, making them a feast for the eyes as well as the palate. With vibrant colors and intricate designs, they can brighten up any dessert table. Imagine a table adorned with pumpkin-shaped cakes, strawberry mousse, and even a watermelon-inspired treat. Each piece not only looks stunning but also offers a burst of flavor that surprises your taste buds.
These cakes are perfect for various occasions, from birthday parties to elegant gatherings. They can be made in different flavors, allowing you to customize them to suit your event. The combination of creamy mousse and a light cake base creates a texture that is simply irresistible. Plus, they are often filled with fruity jellies or purees, adding an extra layer of deliciousness.
If you’re feeling inspired to make your own fruit-shaped mousse cake, here’s a simple recipe to get you started!
3. Floral-Infused Treats (Lavender, Rose, Orange Blossom)
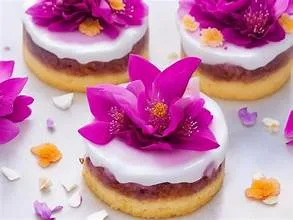
Floral-infused desserts are making waves in the culinary scene. Imagine a table adorned with delicate cupcakes, macarons, and creamy desserts, all infused with the essence of flowers like lavender, rose, and orange blossom. These treats not only look stunning but also bring a unique flavor profile that’s both refreshing and aromatic.
The image captures a beautiful spread of floral-themed desserts. You can see a lovely cupcake topped with a soft, pastel-hued frosting and garnished with tiny edible flowers. Nearby, there are elegant macarons and a charming arrangement of roses that enhance the overall aesthetic. This delightful presentation makes these desserts perfect for any occasion, from weddings to garden parties.
Using floral flavors can elevate your baking game. Lavender adds a calming touch, while rose offers a romantic vibe. Orange blossom brings a hint of citrus that brightens up any dessert. These flavors can be incorporated into cakes, cookies, or even drinks, making them versatile for various events.
Ingredients
- 1 ½ cups all-purpose flour
- 1 cup granulated sugar
- ½ cup unsalted butter, softened
- 2 large eggs
- ½ cup milk
- 1 tablespoon culinary lavender (or rose water/orange blossom water)
- 2 teaspoons baking powder
- ½ teaspoon salt
- 1 teaspoon vanilla extract
- Edible flowers for decoration
Instructions
- Preheat your oven to 350°F (175°C) and line a cupcake pan with liners.
- In a bowl, cream together the softened butter and sugar until light and fluffy.
- Add the eggs one at a time, mixing well after each addition. Stir in the vanilla extract and floral flavoring.
- In another bowl, whisk together the flour, baking powder, and salt.
- Gradually add the dry ingredients to the wet mixture, alternating with the milk. Mix until just combined.
- Fill each cupcake liner about two-thirds full with the batter.
- Bake for 18-20 minutes, or until a toothpick inserted into the center comes out clean.
- Let the cupcakes cool completely before frosting. Decorate with edible flowers for a beautiful finish.
4. No-Bake Summer Desserts (Strawberry Pops, Watermelon Pie)
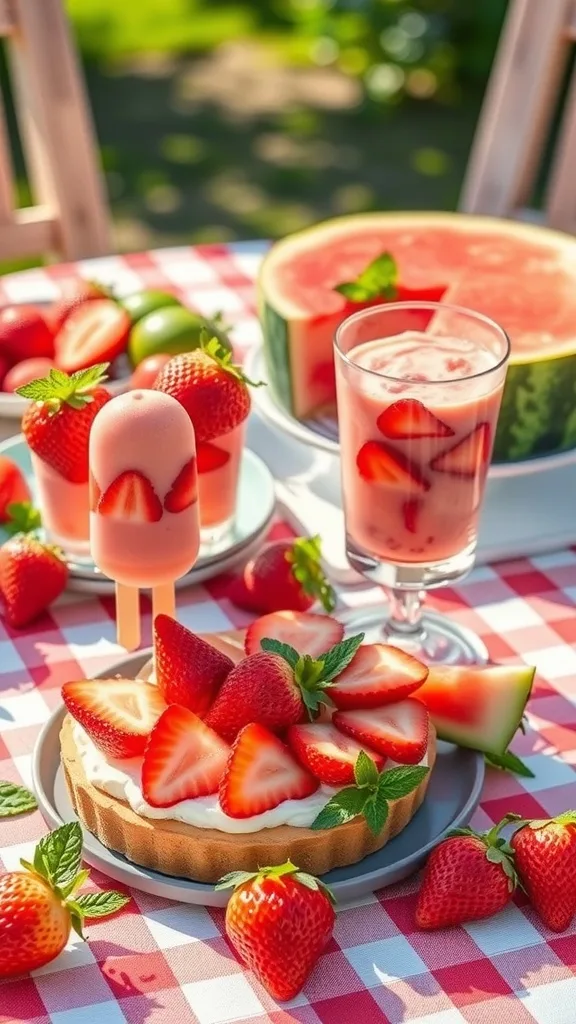
Summer is the perfect time to enjoy light and refreshing desserts. No-bake treats like strawberry pops and watermelon pie are not only delicious but also easy to make. These desserts are ideal for hot days when you want something sweet without turning on the oven.
The image showcases a vibrant spread of summer delights. You can see strawberry popsicles, a creamy watermelon pie, and fresh strawberries all beautifully arranged on a picnic table. The bright colors and fresh ingredients make these desserts a feast for the eyes as well as the taste buds.
Strawberry pops are a fun way to cool down. They are made with fresh strawberries, yogurt, and a bit of honey. Watermelon pie, on the other hand, is a unique twist that combines the sweetness of watermelon with a creamy filling, making it a hit at any summer gathering.
Ingredients
- 2 cups fresh strawberries, hulled
- 1 cup yogurt (plain or flavored)
- 2 tablespoons honey or maple syrup
- 1 large watermelon
- 1 cup whipped cream
- 1/2 cup cream cheese, softened
- 1 teaspoon vanilla extract
- Fresh mint leaves for garnish
Instructions
- Make the Strawberry Pops: In a blender, combine the strawberries, yogurt, and honey. Blend until smooth. Pour the mixture into popsicle molds and freeze for at least 4 hours.
- Prepare the Watermelon Pie: Cut the watermelon in half and scoop out the flesh, leaving a shell. In a bowl, mix the whipped cream, cream cheese, and vanilla until smooth. Fold in the watermelon pieces.
- Fill the Watermelon Shell: Spoon the cream mixture back into the watermelon shell. Chill in the refrigerator for at least 2 hours before serving.
- Serve: Slice the watermelon pie and enjoy with the strawberry pops. Garnish with fresh mint leaves for an extra touch.
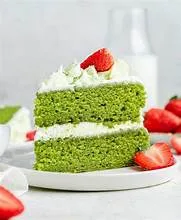
5. Vegetable-Based Desserts (Zucchini Cake, Tofu Cheesecake)
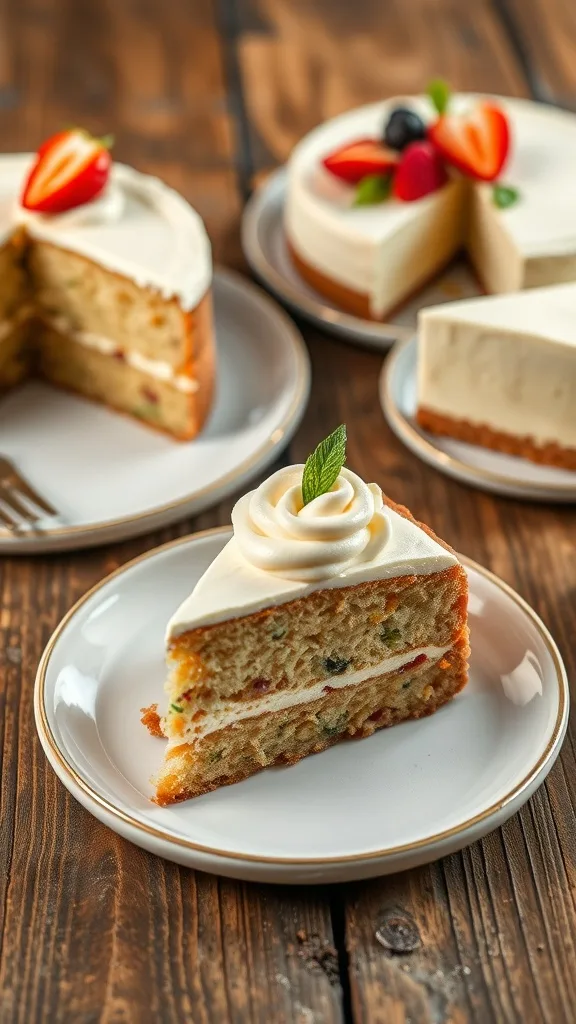
Vegetable-based desserts are gaining popularity, and for good reason! They offer a unique twist on traditional sweets while sneaking in some extra nutrition. Zucchini cake is a fantastic example. This moist, flavorful cake uses grated zucchini, making it a delightful treat that feels indulgent yet wholesome. The addition of spices like cinnamon and nutmeg enhances its flavor, making it perfect for any occasion.
Tofu cheesecake is another exciting option. This creamy dessert uses silken tofu to create a rich texture without the heaviness of cream cheese. It’s often flavored with vanilla or fruit purees, making it a light yet satisfying dessert. Both of these options are not only delicious but also a fun way to incorporate veggies into your diet.
Here’s a simple recipe for a delicious Zucchini Cake that you can easily whip up:
Ingredients
- 2 cups grated zucchini
- 1 ½ cups all-purpose flour
- 1 cup granulated sugar
- ½ cup vegetable oil
- 3 large eggs
- 1 teaspoon vanilla extract
- 1 teaspoon baking powder
- 1 teaspoon baking soda
- 1 teaspoon ground cinnamon
- ½ teaspoon salt
- ½ cup chopped walnuts (optional)
Instructions
- Preheat your oven to 350°F (175°C). Grease and flour a 9×13 inch baking pan.
- In a large bowl, mix together the grated zucchini, sugar, and oil until well combined.
- Add the eggs and vanilla extract, mixing until smooth.
- In another bowl, whisk together the flour, baking powder, baking soda, cinnamon, and salt.
- Gradually add the dry ingredients to the wet ingredients, stirring until just combined. Fold in the walnuts if using.
- Pour the batter into the prepared pan and spread evenly.
- Bake for 30-35 minutes, or until a toothpick inserted in the center comes out clean.
- Let it cool before serving. Enjoy your delicious zucchini cake!
6. Mini Cheesecakes & Dessert Shots
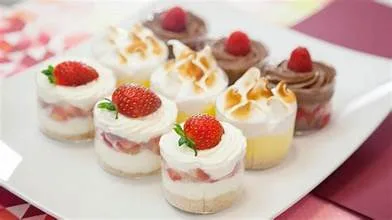
Mini cheesecakes and dessert shots are the perfect treats for any gathering. They’re not just cute; they’re bursting with flavor and can be customized to fit any occasion. Imagine a table filled with these delightful bites, each one topped with fresh fruits, colorful glazes, or even edible flowers. The presentation is as appealing as the taste, making them a hit at parties, weddings, or casual get-togethers.
These little desserts are versatile. You can create a variety of flavors, from classic vanilla to rich chocolate or fruity options like strawberry and mango. The best part? They’re easy to serve and eat, making them a favorite among guests of all ages.
To make your own mini cheesecakes, you’ll need some simple ingredients. Here’s a quick recipe to get you started:
Ingredients
- 1 cup graham cracker crumbs
- 1/4 cup granulated sugar
- 1/2 cup unsalted butter, melted
- 16 oz cream cheese, softened
- 1 cup powdered sugar
- 1 teaspoon vanilla extract
- 2 large eggs
- Your choice of toppings (fresh fruit, chocolate sauce, etc.)
Instructions
- Preheat your oven to 325°F (160°C).
- In a bowl, mix graham cracker crumbs, sugar, and melted butter until combined. Press this mixture into the bottom of mini cheesecake pans or muffin tins to form a crust.
- In another bowl, beat the cream cheese until smooth. Gradually add powdered sugar and vanilla, mixing well.
- Add eggs one at a time, mixing just until combined. Avoid overmixing.
- Pour the cream cheese mixture over the crusts in the pans.
- Bake for about 20-25 minutes, or until the centers are set. Let them cool, then refrigerate for at least 2 hours.
- Once chilled, top with your favorite toppings and serve!
7. Artisan Ice Cream Creations (Gelato Floats, Mochi Ice Cream)
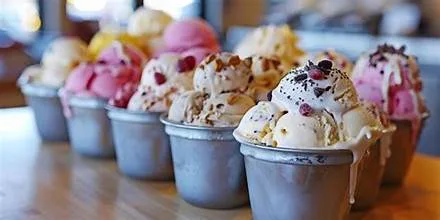
Artisan ice cream creations are taking the dessert scene by storm, and it’s easy to see why. The image showcases vibrant gelato floats and colorful mochi ice cream, perfect for any occasion. The gelato floats, served in tall glasses with playful straws, are a refreshing treat, while the mochi ice cream balls, arranged neatly on a plate, add a fun twist to traditional ice cream.
Gelato floats are a delightful combination of creamy gelato and fizzy soda, creating a refreshing dessert that’s perfect for warm days. You can mix and match flavors to create your own unique combinations. On the other hand, mochi ice cream offers a chewy, sweet experience that pairs perfectly with the rich flavors of the ice cream inside.
Whether you’re hosting a summer party or just treating yourself, these artisan ice cream creations are sure to impress. They’re not just desserts; they’re a fun experience that everyone can enjoy!
Ingredients
- 2 cups gelato (your choice of flavors)
- 1 cup soda (like lemon-lime or root beer)
- 1 cup sweet rice flour (mochi flour)
- 1/2 cup sugar
- 1 cup water
- 1/2 cup ice cream (for filling)
- Food coloring (optional)
- Cornstarch (for dusting)
Instructions
- Make the Mochi: In a microwave-safe bowl, mix sweet rice flour, sugar, and water. Stir until smooth. Microwave for 1 minute, stir, then microwave for another minute. Repeat until the mixture is thick and sticky.
- Shape the Mochi: Dust a clean surface with cornstarch. Pour the mochi mixture onto the surface and let it cool slightly. Once cool, cut into small squares. Flatten each square and place a small scoop of ice cream in the center. Fold the mochi over the ice cream and seal it, then dust with more cornstarch.
- Prepare the Gelato Floats: In a tall glass, add a scoop of gelato. Slowly pour soda over the gelato until the glass is full. Add a straw and enjoy!
- Serve: Arrange the mochi ice cream on a plate and serve alongside the gelato floats for a delightful dessert spread.
8. 3D Gelatin Art Dessert Cups
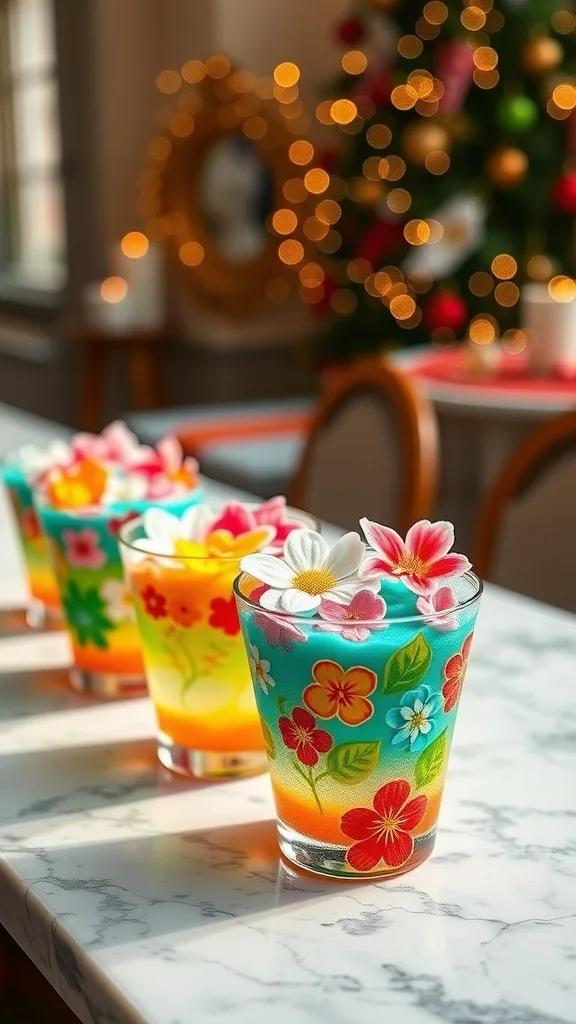
3D gelatin art dessert cups are a feast for the eyes and the taste buds. These colorful creations combine art and dessert in a delightful way. Each cup features vibrant layers of gelatin, often showcasing intricate floral designs that seem to float within. They are perfect for any occasion, from birthday parties to holiday gatherings.
Making these dessert cups can be a fun activity. You can customize the colors and designs to match the theme of your event. The clear gelatin allows the beautiful patterns to shine through, making them not just a treat but also a centerpiece.
To create your own 3D gelatin art dessert cups, you’ll need some basic ingredients and a bit of patience. The result will be a stunning dessert that impresses everyone!
9. Kataifi & Pistachio Pastries
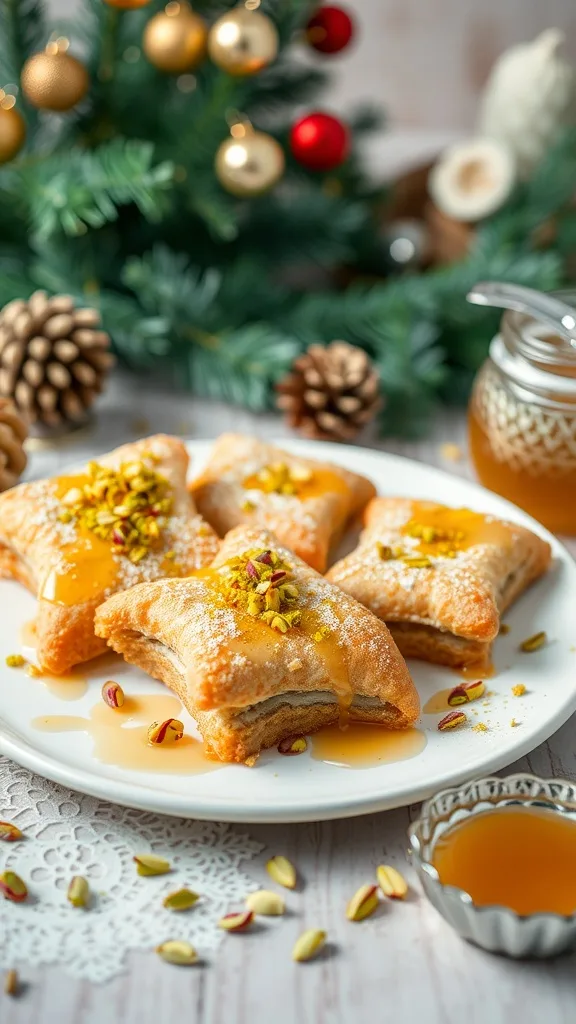
Kataifi and pistachio pastries are a delightful treat that brings a taste of tradition to any occasion. These pastries are made with shredded phyllo dough, giving them a unique texture that’s both crispy and flaky. The combination of sweet syrup and crunchy pistachios makes them irresistible. Perfect for gatherings, they add a festive touch to your dessert table.
The image showcases these beautiful pastries drizzled with honey and topped with crushed pistachios, making them not only delicious but also visually appealing. The warm, inviting colors of the syrup and the vibrant green of the pistachios create a festive atmosphere, ideal for celebrations.
Whether you’re hosting a holiday party or simply want to treat yourself, these pastries are sure to impress. They are easy to make and can be prepared in advance, allowing you to enjoy your time with guests. Let’s get started on making these tasty treats!
10. Cruffins (Croissant-Muffin Fusion)
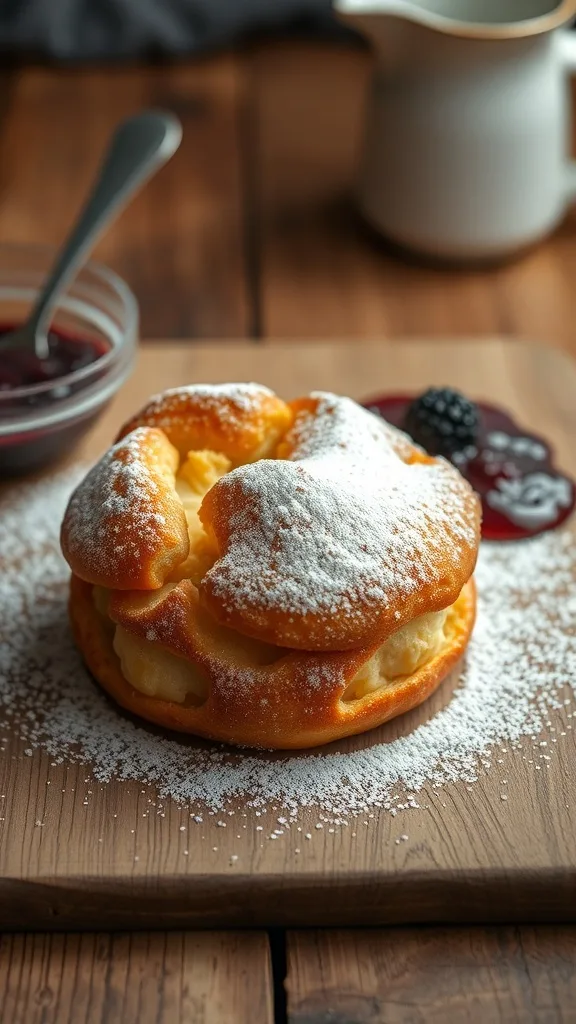
Cruffins are the delightful lovechild of croissants and muffins. Imagine biting into a flaky, buttery pastry that’s light and airy, yet holds a rich filling. These treats are perfect for breakfast or dessert and can be customized with various flavors.
The image showcases a beautifully baked cruffin, dusted with powdered sugar and served with a side of berry jam. The golden-brown exterior hints at the flaky layers inside, while the filling peeks through, inviting you to take a bite. This dessert is not just a feast for the taste buds but also a treat for the eyes.
Making cruffins at home is easier than you might think. With just a few ingredients, you can whip up a batch that will impress your friends and family. Let’s get into the recipe!
Ingredients
- 1 cup all-purpose flour
- 1/2 cup unsalted butter, softened
- 1/4 cup granulated sugar
- 1/4 teaspoon salt
- 1/2 cup milk
- 1 tablespoon active dry yeast
- 1 large egg
- 1 teaspoon vanilla extract
- 1/2 cup pastry cream or jam (for filling)
- Powdered sugar (for dusting)
Instructions
- Activate the Yeast: In a small bowl, combine warm milk and yeast. Let it sit for about 5 minutes until foamy.
- Make the Dough: In a large bowl, mix flour, sugar, and salt. Add the yeast mixture, softened butter, egg, and vanilla. Stir until a dough forms.
- Knead the Dough: Turn the dough onto a floured surface and knead for about 5-7 minutes until smooth. Place it in a greased bowl, cover, and let rise for about 1 hour until doubled in size.
- Shape the Cruffins: Roll out the dough into a rectangle. Spread softened butter on top and cut into strips. Roll each strip into a spiral and place in a greased muffin tin.
- Fill and Bake: Let the cruffins rise for another 30 minutes. Preheat the oven to 375°F (190°C). Bake for 20-25 minutes until golden brown. Fill with pastry cream or jam after baking.
- Finish: Dust with powdered sugar before serving. Enjoy your homemade cruffins!
11. Paris-Brest Pastries
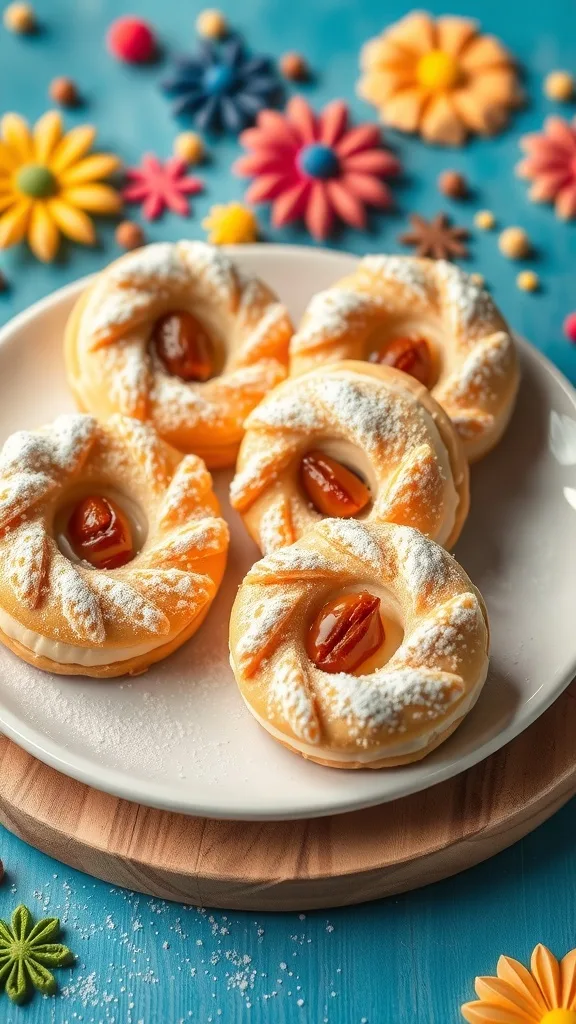
Paris-Brest pastries are a delightful treat that brings a taste of France right to your table. These pastries are made from choux pastry, which is light and airy, and filled with a rich cream. The round shape of the pastry symbolizes a bicycle wheel, honoring the Paris-Brest-Paris cycling race. Each bite is a perfect blend of textures and flavors, making them a popular choice for any occasion.
Typically, these pastries are topped with a dusting of powdered sugar and often garnished with almonds for an extra crunch. The filling can vary, but a classic choice is a creamy praline or pastry cream that adds a nutty sweetness. Whether you’re celebrating a special event or just treating yourself, Paris-Brest pastries are sure to impress.
Ingredients
- 1 cup water
- 1/2 cup unsalted butter
- 1 cup all-purpose flour
- 1/4 teaspoon salt
- 4 large eggs
- 1 cup heavy cream
- 1/2 cup powdered sugar
- 1/4 cup praline paste (optional)
- 1/4 cup sliced almonds (for topping)
- Extra powdered sugar for dusting
Instructions
- Make the Choux Pastry: In a saucepan, combine water and butter. Bring to a boil, then remove from heat. Stir in flour and salt until the mixture forms a ball. Let it cool slightly.
- Add Eggs: Beat in eggs one at a time, mixing well after each addition until smooth and glossy.
- Shape the Pastries: Preheat your oven to 400°F (200°C). Pipe the dough into a large ring shape on a baking sheet lined with parchment paper. Sprinkle with sliced almonds.
- Bake: Bake for 25-30 minutes until golden and puffed. Let cool completely.
- Prepare the Cream: Whip the heavy cream with powdered sugar until soft peaks form. If using, fold in praline paste for flavor.
- Fill the Pastries: Slice the cooled pastry in half and fill with whipped cream. Replace the top and dust with powdered sugar before serving.
12. Salted-Caramel & Sweet-Salty Mashups
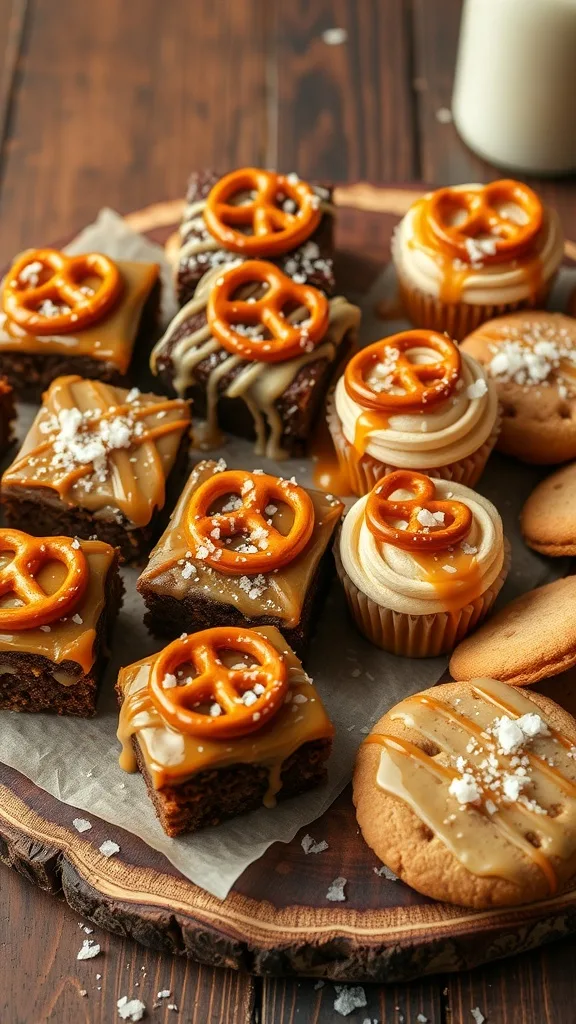
Salted caramel has taken the dessert world by storm, and for good reason! This delightful combination of sweet and salty flavors creates a unique taste experience that’s hard to resist. The image showcases an array of treats that perfectly embody this trend. From brownies drizzled with rich caramel to cupcakes topped with creamy frosting and crunchy pretzels, each dessert offers a satisfying balance of flavors.
These sweet-salty mashups are perfect for any occasion, whether it’s a birthday party, a cozy gathering, or just a treat for yourself. The addition of pretzels adds a fun crunch and enhances the overall flavor profile. You can easily whip up these treats at home to impress your friends and family.
Ingredients
- 1 cup unsalted butter, softened
- 1 cup brown sugar
- 1/2 cup granulated sugar
- 2 large eggs
- 2 teaspoons vanilla extract
- 2 cups all-purpose flour
- 1 teaspoon baking soda
- 1/2 teaspoon salt
- 1 cup chocolate chips
- 1 cup crushed pretzels
- 1 cup salted caramel sauce
- Extra pretzels for topping
Instructions
- Preheat your oven to 350°F (175°C) and grease a 9×13 inch baking pan.
- In a large bowl, cream together the softened butter, brown sugar, and granulated sugar until light and fluffy.
- Add the eggs one at a time, mixing well after each addition. Stir in the vanilla extract.
- In another bowl, whisk together the flour, baking soda, and salt. Gradually add this to the butter mixture, mixing until just combined.
- Fold in the chocolate chips and crushed pretzels.
- Spread half of the batter into the prepared baking pan. Drizzle half of the salted caramel sauce over the batter.
- Spread the remaining batter on top and drizzle with the rest of the caramel sauce. Use a knife to swirl the caramel into the batter.
- Top with extra pretzels for a crunchy finish.
- Bake for 25-30 minutes or until a toothpick comes out clean. Let cool before cutting into squares.
13. Coffee & Tea-Flavored Cakes & Ice Creams (Matcha, Chai)
When it comes to desserts, coffee and tea flavors are trending like never before. Matcha and chai cakes and ice creams are not just delicious; they also bring a unique twist to traditional sweets. The vibrant green of matcha and the warm spices of chai create a feast for the eyes as well as the palate.
Imagine a beautifully layered matcha cake, its rich green hue contrasting with a creamy filling. Next to it, fluffy chai-flavored cupcakes swirl with spiced frosting. These desserts are perfect for any occasion, whether it’s a casual gathering or a special celebration.
To make your own matcha cake and chai cupcakes, here’s a simple recipe to get you started!
Ingredients
- 2 cups all-purpose flour
- 1 cup granulated sugar
- 1 tablespoon matcha powder
- 1 teaspoon baking powder
- 1/2 teaspoon baking soda
- 1/4 teaspoon salt
- 1/2 cup unsalted butter, softened
- 1 cup milk
- 2 large eggs
- 1 teaspoon vanilla extract
- 1 tablespoon chai spice mix (cinnamon, cardamom, ginger)
- 1 cup heavy cream (for frosting)
- 1/2 cup powdered sugar (for frosting)
Instructions
- Preheat your oven to 350°F (175°C). Grease and flour two 9-inch round cake pans.
- In a large bowl, mix flour, sugar, matcha powder, baking powder, baking soda, and salt.
- Add softened butter, milk, eggs, and vanilla extract. Beat until smooth.
- Divide the batter between the prepared pans and bake for 25-30 minutes, or until a toothpick comes out clean.
- While the cakes cool, whip the heavy cream with powdered sugar until soft peaks form.
- Once the cakes are cool, layer them with whipped cream and sprinkle some chai spice mix in between.
- For chai cupcakes, use the same batter but fill cupcake liners and bake for 18-20 minutes. Frost with whipped cream and sprinkle with chai spice.
14. Torta Caprese (Flourless Chocolate Cake)
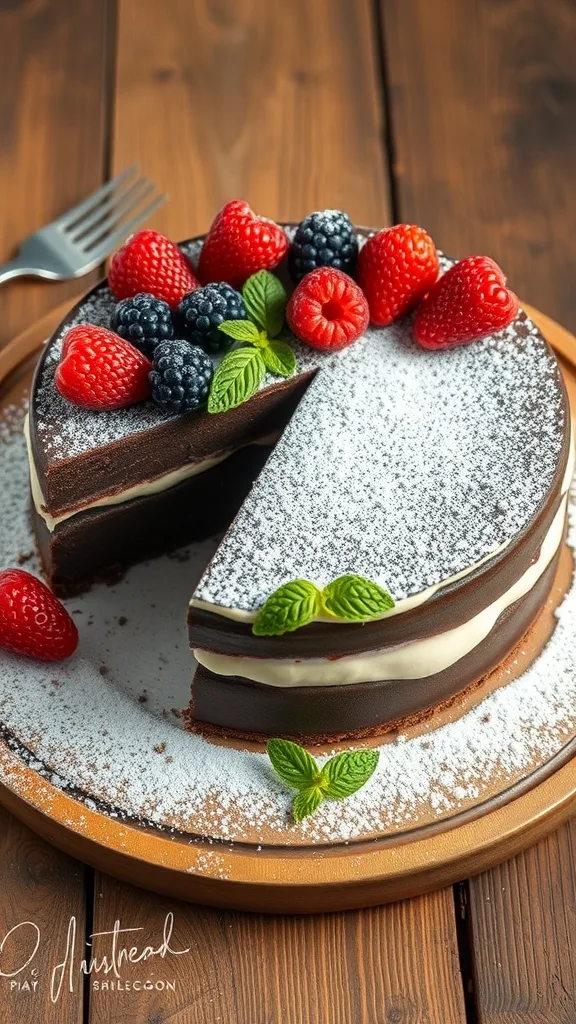
Torta Caprese is a rich and indulgent flourless chocolate cake that hails from the beautiful island of Capri, Italy. This dessert is perfect for any occasion, whether it’s a birthday party or a cozy dinner at home. The image showcases a beautifully crafted Torta Caprese, topped with fresh berries and mint leaves, making it not just delicious but visually appealing too.
The cake is known for its dense, fudgy texture and deep chocolate flavor, which comes from high-quality dark chocolate. The addition of eggs and sugar creates a lovely rise, while the absence of flour keeps it gluten-free. It’s a dessert that can impress anyone, from chocolate lovers to those who usually shy away from sweets.
To make this delightful cake, you’ll need simple ingredients that come together to create something extraordinary. Serve it with a dusting of powdered sugar and a dollop of whipped cream for an extra touch of elegance.
Ingredients
- 8 ounces dark chocolate, chopped
- 1/2 cup unsalted butter
- 3/4 cup granulated sugar
- 3 large eggs
- 1 teaspoon vanilla extract
- 1/4 teaspoon salt
- 1/2 cup cocoa powder
- Powdered sugar for dusting
- Fresh berries and mint leaves for garnish
Instructions
- Preheat your oven to 350°F (175°C). Grease an 8-inch round cake pan and line the bottom with parchment paper.
- In a medium saucepan, melt the chopped chocolate and butter over low heat, stirring until smooth. Remove from heat and let it cool slightly.
- In a large bowl, whisk together the sugar, eggs, vanilla extract, and salt until combined. Gradually add the melted chocolate mixture, stirring until well blended.
- Sift in the cocoa powder and mix until just combined. Pour the batter into the prepared cake pan.
- Bake for 25-30 minutes, or until the top is set and a toothpick inserted comes out with a few moist crumbs.
- Allow the cake to cool in the pan for 10 minutes, then transfer it to a wire rack to cool completely.
- Once cooled, dust the top with powdered sugar and decorate with fresh berries and mint leaves before serving.
15. Basque Burnt Cheesecake
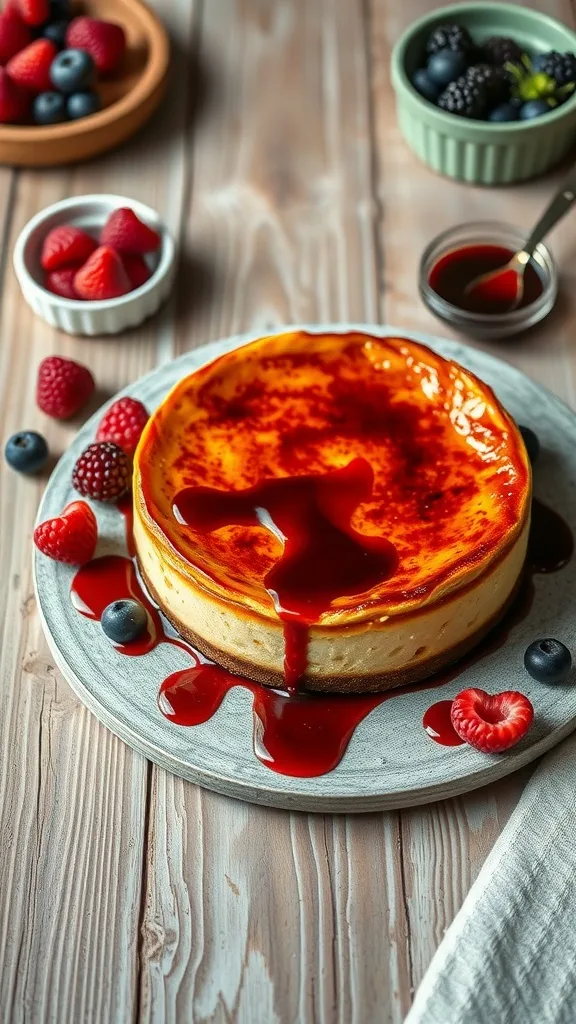
Basque Burnt Cheesecake is a delightful twist on the classic dessert. This cheesecake is known for its unique, caramelized top and creamy center. The image showcases a beautifully baked cheesecake, with a rich, golden-brown crust that hints at its delicious flavor. Surrounding the cheesecake are fresh berries, adding a pop of color and freshness that perfectly complements the dessert.
This dessert is not only visually appealing but also incredibly easy to make. It’s perfect for any occasion, whether it’s a casual dinner or a special celebration. The combination of the burnt top and creamy filling creates a flavor profile that is simply irresistible.
Ingredients
- 2 cups cream cheese, softened
- 1 cup granulated sugar
- 1 cup heavy cream
- 3 large eggs
- 1 teaspoon vanilla extract
- 1/4 cup all-purpose flour
- 1/4 teaspoon salt
Instructions
- Preheat your oven to 400°F (200°C). Line a 9-inch springform pan with parchment paper, allowing some overhang.
- In a large bowl, beat the cream cheese and sugar until smooth. Add the heavy cream and mix until well combined.
- In another bowl, whisk the eggs, vanilla extract, flour, and salt together. Gradually add this mixture to the cream cheese mixture, blending until smooth.
- Pour the batter into the prepared pan and smooth the top. Bake for about 40-45 minutes, or until the top is dark brown and the center is slightly jiggly.
- Let the cheesecake cool in the pan for about 30 minutes, then refrigerate for at least 4 hours before serving. Remove from the pan and enjoy with fresh berries on the side.
16. Mini Ice Cream Sandwiches
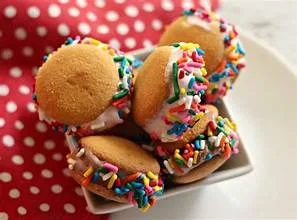
Mini ice cream sandwiches are a delightful treat that brings joy to any gathering. These bite-sized desserts combine creamy ice cream with soft cookies, making them perfect for kids and adults alike. The image showcases a colorful platter filled with various mini ice cream sandwiches, each one looking more tempting than the last. With sprinkles, vibrant colors, and fun designs, they are sure to catch the eye and spark excitement.
These mini treats are not just visually appealing; they are also incredibly versatile. You can mix and match flavors and toppings to create your own unique combinations. Whether you prefer classic chocolate chip cookies or something more adventurous like macarons, the possibilities are endless. They are easy to make and can be prepared ahead of time, making them a great option for parties or casual get-togethers.
To make your own mini ice cream sandwiches, gather your favorite cookies and ice cream flavors. You can use store-bought cookies or whip up a batch of homemade ones. Once you have your ingredients ready, simply scoop a small amount of ice cream onto one cookie, press another cookie on top, and roll the edges in sprinkles or nuts for added flair. Freeze them for a bit to set, and you’re ready to serve!
17. Piña Colada Sorbet In Fruit Shell
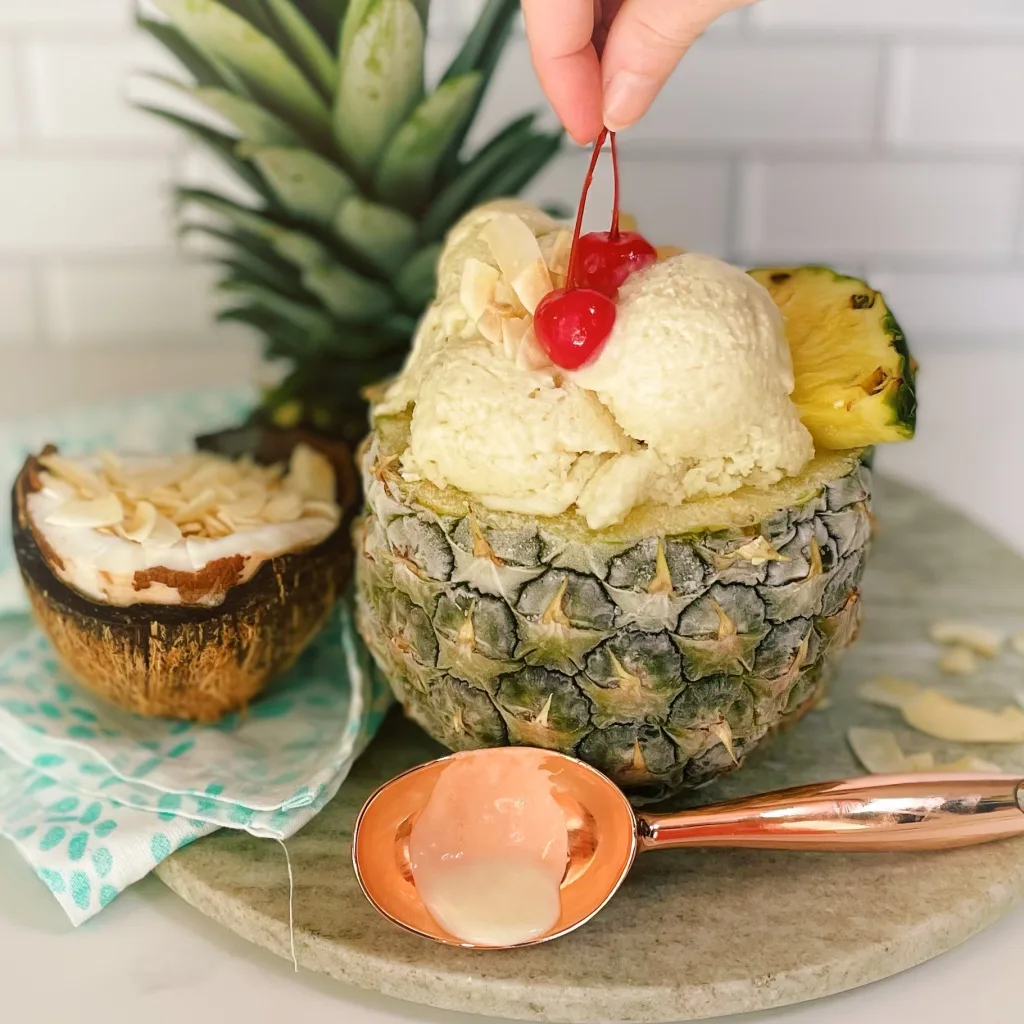
Picture this: a sunny beach, the sound of waves, and a refreshing treat that captures the essence of summer. The Piña Colada Sorbet served in a pineapple shell is a delightful way to enjoy a classic tropical flavor. This dessert not only looks stunning but also brings a burst of freshness with every bite.
The sorbet is smooth and creamy, made with ripe pineapples, coconut milk, and a hint of rum for that authentic piña colada taste. The pineapple shell adds a fun twist, making it a perfect centerpiece for any summer gathering or beach party.
To make this treat, you’ll need fresh ingredients and a little bit of time. The combination of sweet pineapple and creamy coconut is irresistible. Plus, serving it in a pineapple shell makes it even more special!
Ingredients
- 2 ripe pineapples
- 1 cup coconut milk
- 1/2 cup sugar
- 1/2 cup fresh lime juice
- 1/4 cup white rum (optional)
- 1/4 cup water
- 1 teaspoon vanilla extract
Instructions
- Prepare the Pineapples: Cut the tops off the pineapples and scoop out the flesh, leaving the shells intact. Set the shells aside.
- Blend the Ingredients: In a blender, combine the pineapple flesh, coconut milk, sugar, lime juice, rum, water, and vanilla extract. Blend until smooth.
- Chill the Mixture: Pour the mixture into a bowl and refrigerate for about 2 hours until chilled.
- Freeze the Sorbet: Pour the chilled mixture into an ice cream maker and churn according to the manufacturer’s instructions. If you don’t have an ice cream maker, pour it into a shallow dish and freeze, stirring every 30 minutes until it reaches a sorbet consistency.
- Serve: Once the sorbet is ready, scoop it into the pineapple shells. Garnish with fresh pineapple slices and a little umbrella for a fun touch!
18. Mochi Ice Cream & Japanese Sweets
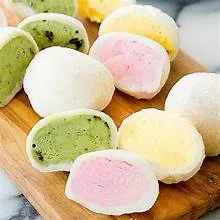
Mochi ice cream is a delightful treat that combines chewy mochi with creamy ice cream. The colorful spheres in the image showcase various flavors, making them visually appealing and fun to eat. Each bite offers a unique taste experience, from fruity to rich chocolate. Alongside the mochi, you can spot other Japanese sweets, adding to the charm of this dessert spread.
These treats are perfect for any occasion, whether it’s a casual get-together or a festive celebration. The combination of textures and flavors makes mochi ice cream a favorite among dessert lovers. Plus, the vibrant colors are sure to brighten up any dessert table!
Ingredients
- 1 cup sweet rice flour (mochi flour)
- 1/4 cup sugar
- 1 cup water
- 1/2 cup ice cream (your choice of flavor)
- Potato starch (for dusting)
Instructions
- Prepare the Mochi Dough: In a microwave-safe bowl, mix the sweet rice flour, sugar, and water until smooth. Cover with plastic wrap and microwave for about 1 minute. Stir, then microwave for another minute. Repeat until the mixture is thick and sticky.
- Shape the Mochi: Dust a clean surface with potato starch. Transfer the mochi dough onto the surface and let it cool slightly. Divide the dough into small pieces and flatten each piece into a circle.
- Add Ice Cream: Place a small scoop of ice cream in the center of each mochi circle. Gently fold the edges over the ice cream and pinch to seal. Roll it into a ball.
- Freeze: Place the mochi balls on a baking sheet lined with parchment paper and freeze for at least 2 hours until firm.
- Serve: Dust with more potato starch before serving to prevent sticking. Enjoy your homemade mochi ice cream!
19. Cherpumple (Cake-Stuffed Pie Tower)
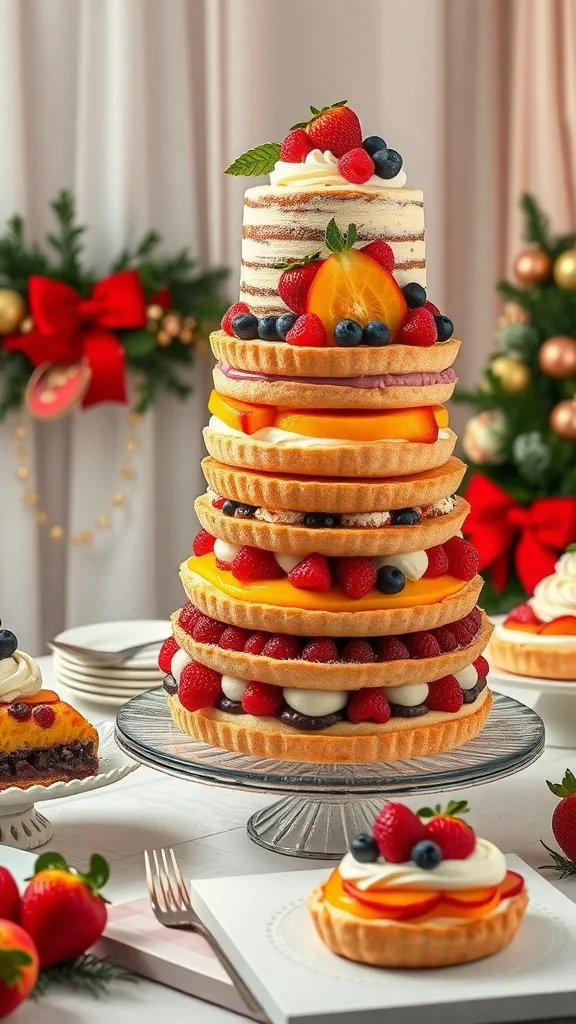
The Cherpumple is a delightful creation that combines three classic desserts into one stunning tower. Imagine a cake stuffed with pie, all stacked beautifully for a show-stopping dessert. This dessert is perfect for any occasion, whether it’s a birthday party, holiday gathering, or just a fun weekend treat.
The image showcases a tall, layered dessert featuring vibrant fruits and creamy frosting. Each layer is a different flavor, making it not just a feast for the eyes but also for the taste buds. The colorful fruits on top add a fresh touch, while the layers of cake and pie promise a rich, satisfying experience.
Making a Cherpumple might seem challenging, but it’s all about layering your favorite flavors. You can choose any combination of cake and pie flavors to create your unique version. It’s a great way to impress your guests and satisfy various dessert cravings in one go!
20. Million-Dollar & Dump Cakes
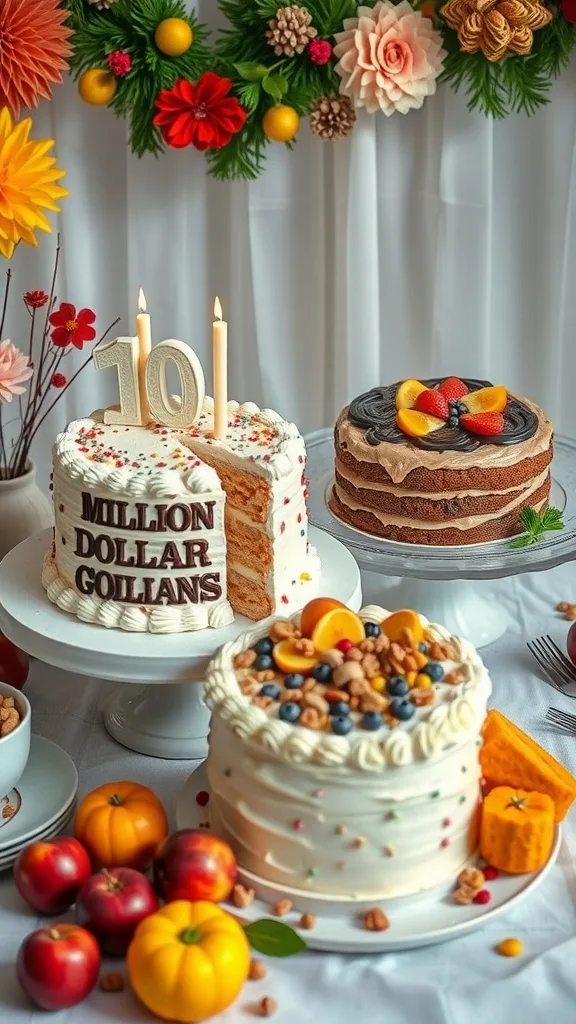
Million-Dollar and Dump Cakes are the perfect blend of simplicity and indulgence. These desserts are not just easy to make; they are also a hit at any gathering. The image captures a delightful display of cakes, showcasing the Million-Dollar cake prominently. This cake is often layered with rich flavors and topped with creamy frosting, making it a showstopper.
In the background, you can see a beautifully decorated dump cake, which is known for its no-fuss preparation. Just dump the ingredients into a pan, and you’re good to go! The vibrant fruits and nuts on top add a fresh touch, making these cakes visually appealing and mouth-watering.
Whether it’s a birthday celebration or a casual get-together, these cakes are sure to impress. They are perfect for those who want a delicious dessert without spending hours in the kitchen.
Ingredients
- 1 box yellow cake mix
- 1 can (15 oz) peach slices, drained
- 1 can (20 oz) crushed pineapple, drained
- 1 cup chopped pecans
- 1 cup unsalted butter, melted
- 1 cup shredded coconut
- 1 cup brown sugar
Instructions
- Preheat your oven to 350°F (175°C).
- In a greased 9×13-inch baking dish, layer the peach slices and crushed pineapple evenly.
- Sprinkle the dry cake mix over the fruit layer.
- Evenly distribute the chopped pecans and shredded coconut on top.
- Pour the melted butter over the entire mixture.
- Sprinkle brown sugar over the top for added sweetness.
- Bake for 45-50 minutes, or until the top is golden brown and bubbly.
- Let it cool slightly before serving. Enjoy warm or at room temperature!
21. Cowboy Cookies
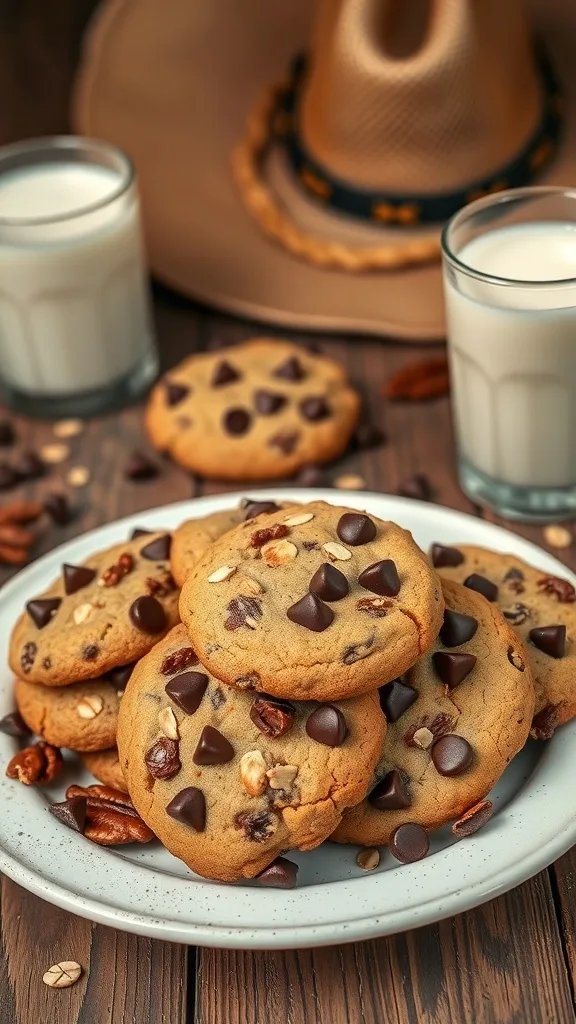
Cowboy cookies are a delightful treat that combines the best of chocolate chip cookies with a hearty twist. Imagine a cookie packed with chocolate chips, oats, and nuts, perfect for satisfying your sweet tooth. The rustic charm of these cookies makes them a favorite for gatherings, picnics, or just a cozy night in.
The image captures a plate of these delicious cookies, surrounded by glasses of milk and a cowboy hat, adding to the fun, western vibe. The cookies are golden brown, with chocolate chips glistening, inviting you to take a bite. Each cookie is thick and chewy, promising a burst of flavor with every mouthful.
Making cowboy cookies is simple and rewarding. They’re great for sharing or enjoying all by yourself. Let’s get into the recipe so you can whip up a batch!
22. Key Lime Icebox & Lemon Pop Desserts
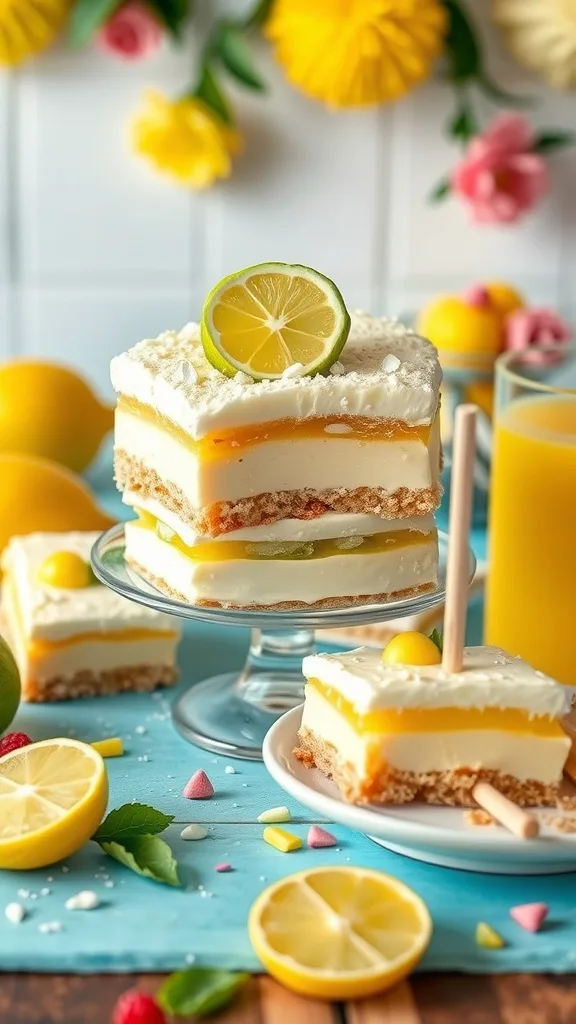
Key Lime Icebox and Lemon Pop desserts are perfect for those sunny days when you crave something refreshing. These desserts are light, tangy, and oh-so-delicious. The layers of creamy filling and zesty citrus flavors create a delightful treat that everyone will love.
Imagine a slice of Key Lime Icebox cake, with its smooth, creamy texture topped with a hint of lime zest. Or picture a Lemon Pop dessert, bursting with bright lemon flavors and a crunchy crust. Both desserts are not only visually appealing but also incredibly easy to make, making them ideal for gatherings or just a sweet treat at home.
These desserts can be made ahead of time, allowing the flavors to meld beautifully. Serve them chilled for the ultimate refreshing experience. Whether you’re hosting a summer barbecue or simply enjoying a quiet evening, these desserts will brighten your day.
Ingredients
- 1 cup graham cracker crumbs
- 1/2 cup unsalted butter, melted
- 1/4 cup granulated sugar
- 1 can (14 ounces) sweetened condensed milk
- 1/2 cup fresh lime juice
- 1 tablespoon lime zest
- 1 cup heavy whipping cream
- 1/4 cup powdered sugar
- Fresh lime slices for garnish
Instructions
- Prepare the Crust: In a bowl, mix graham cracker crumbs, melted butter, and granulated sugar until combined. Press the mixture into the bottom of a 9-inch square dish.
- Make the Filling: In another bowl, whisk together sweetened condensed milk, lime juice, and lime zest until smooth. Pour this mixture over the crust.
- Chill: Cover the dish and refrigerate for at least 4 hours or until set.
- Whip the Cream: In a mixing bowl, beat heavy whipping cream and powdered sugar until soft peaks form. Spread the whipped cream over the lime filling.
- Garnish: Top with fresh lime slices before serving. Cut into squares and enjoy!
23. Baklava & Middle Eastern Sweet Rolls
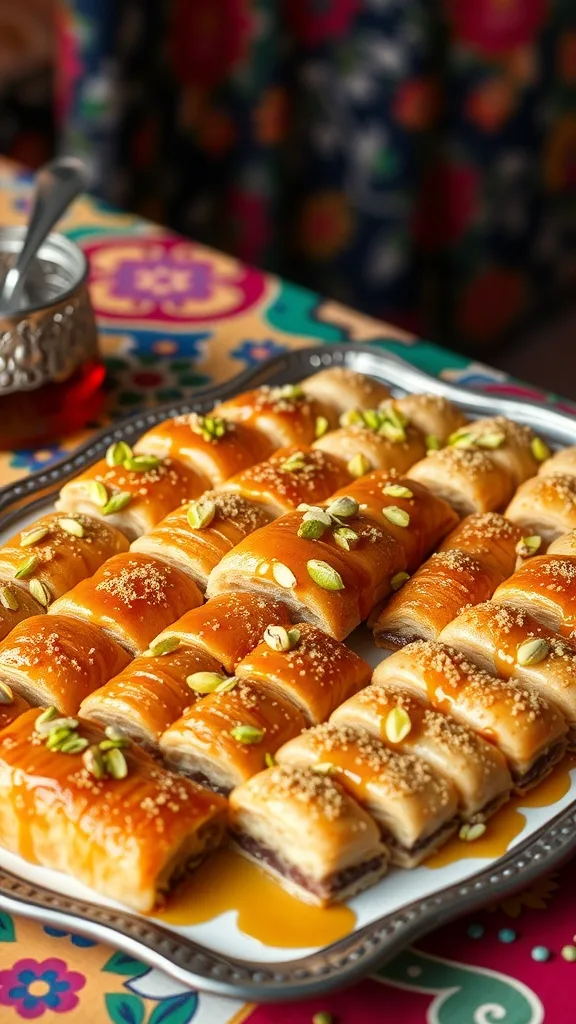
Baklava and Middle Eastern sweet rolls are a delightful treat that brings a taste of tradition to any occasion. These desserts are known for their flaky layers of pastry, rich nuts, and sweet syrup. The image showcases beautifully arranged rolls, glistening with syrup and topped with crushed pistachios, making them irresistible.
Baklava is made with layers of phyllo dough, filled with a mixture of nuts like walnuts or pistachios, and sweetened with honey or syrup. Each bite offers a perfect balance of crunch and sweetness. Middle Eastern sweet rolls, on the other hand, can vary in fillings and shapes, often featuring dates, nuts, or even chocolate.
These desserts are perfect for gatherings, celebrations, or simply as a sweet treat after a meal. They not only satisfy your sweet tooth but also bring a touch of culture to your table.
Ingredients
- 1 package phyllo dough (16 oz)
- 2 cups mixed nuts (walnuts, pistachios, almonds)
- 1 cup unsalted butter, melted
- 1 teaspoon ground cinnamon
- 1 cup sugar
- 1 cup water
- 1/2 cup honey
- 1 teaspoon vanilla extract
Instructions
- Prepare the Nut Filling: Finely chop the mixed nuts and combine them with ground cinnamon in a bowl.
- Layer the Phyllo: Preheat the oven to 350°F (175°C). Brush a baking dish with melted butter. Layer 8 sheets of phyllo dough, brushing each layer with butter.
- Add Filling: Spread a layer of the nut mixture evenly over the phyllo. Continue layering with 4 more sheets of phyllo, brushing with butter in between. Repeat this process until all the nuts are used, finishing with a top layer of phyllo (about 8 sheets).
- Cut and Bake: Cut the baklava into diamond or square shapes. Bake for 45-50 minutes until golden brown.
- Prepare the Syrup: While the baklava is baking, combine sugar, water, honey, and vanilla in a saucepan. Bring to a boil, then reduce heat and simmer for about 10 minutes.
- Finish: Once the baklava is done, pour the hot syrup over it. Let it cool completely before serving.
24. Layered Éclairs, Verrines & Entremets
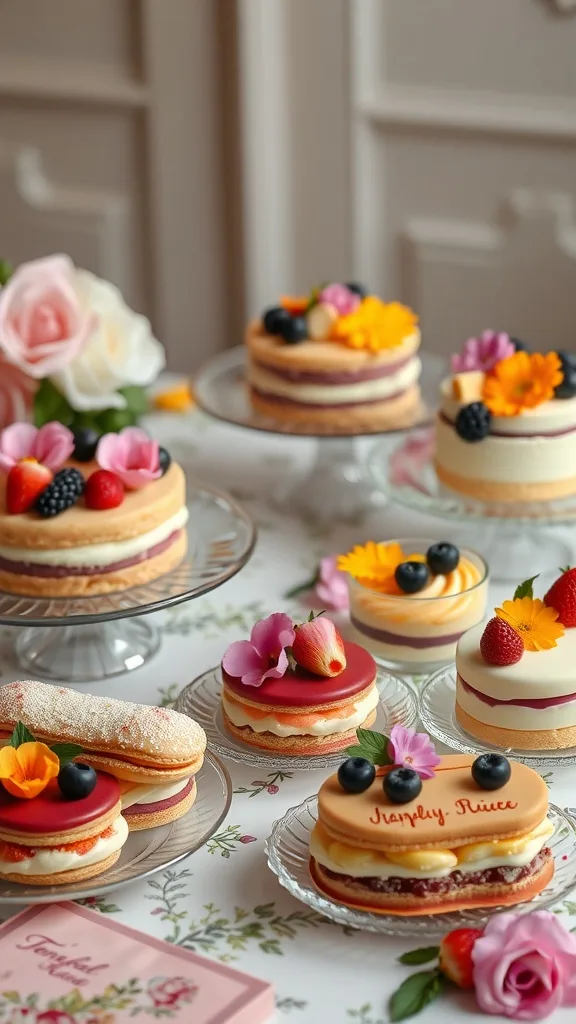
Layered éclairs, verrines, and entremets are the stars of the dessert world in 2025. These treats are not just about taste; they are a feast for the eyes. The image showcases an array of beautifully crafted desserts, each one a unique creation. You can spot colorful éclairs topped with fresh fruits and delicate flowers, adding a touch of elegance. The verrines, with their layered textures, invite you to dig in and enjoy the delightful combinations of flavors.
Entremets, often multi-layered cakes, are also featured. They boast rich creams and mousses, making them perfect for celebrations. These desserts are versatile and can be customized for any occasion, from birthdays to weddings. Their stunning presentation makes them a favorite for dessert tables.
Whether you’re a pastry chef or a home baker, trying your hand at these desserts can be a fun experience. With the right ingredients and a bit of creativity, you can impress your guests with these trendy treats.
Ingredients
- 1 cup all-purpose flour
- 1/2 cup unsalted butter
- 1 cup water
- 4 large eggs
- 1/4 teaspoon salt
- 1 cup heavy cream
- 1/4 cup powdered sugar
- 1 teaspoon vanilla extract
- Fresh fruits (strawberries, blueberries, etc.)
- Edible flowers for decoration
Instructions
- Preheat your oven to 400°F (200°C).
- In a saucepan, combine water, butter, and salt. Bring to a boil.
- Add flour all at once and stir vigorously until the mixture forms a ball. Remove from heat.
- Let it cool slightly, then add eggs one at a time, mixing well after each addition.
- Pipe the dough onto a baking sheet, forming éclairs. Bake for 25-30 minutes until golden brown.
- While the éclairs cool, whip the heavy cream with powdered sugar and vanilla until stiff peaks form.
- Once cooled, fill the éclairs with whipped cream and top with fresh fruits and edible flowers.
- Serve your layered éclairs and enjoy the compliments!